
At Potential Plus UK we see many high learning potential children who struggle with handwriting. A project a couple of years ago with Prof. Diane Montgomery gave us more insight into how to support these children and since then we have worked with many children to improve their script.
The news is that, in our experience, handwriting can almost always be improved in a fairly short period of time, no matter the age of the child (over 7 years). The bad news is that it takes sustained effort on the part of the child and the parents to see improvement.
Although the support needed varies from child to child, due to the different underlying reasons for the difficulty, we have broken down the steps we have found most often lead to improvement. These steps can be used from the age of 7. Before this, young children’s hands are developing and they may change their grip several times before settling on their most preferred. The best intervention below the age of 7 is to work on gross and fine motor skills generally. See advice sheet PA316 Developing Fine Motor Skills in High Learning Potential Children
Step 1 – Buy In
It is important that a child wants to improve their handwriting and is willing to put in the effort to do so. For best success, discuss this frankly with your child. Speak to them about how having a more automatic script will make life easier for them and allow them to get down their ideas on paper better. Let them know that if they want to improve it can be done easily but they will need to commit to 5-10 minutes a day of practice. Parents need to commit to spending this time with them supervising their practice. The more often your child practises, the quicker the improvement will be.
Sometimes, when going through the early stages of these steps, a child’s handwriting gets worse for a short period, so let your child’s teacher know what you are doing and ask them not to comment on your child’s handwriting for the next few weeks.
Step 2 – Establish a Baseline
Set aside half-an-hour to evaluate your child’s handwriting. Ask them to write out as neatly as possible the following holoalphabetic sentence on lined paper, ‘The quick onyx goblin jumps over the lazy dwarf.’ Time for two minutes and ask them to start again at the beginning if they get to the end. Ask them to do the same again but this time as quickly as they can, not worrying about the neatness as long as you can read it. Count the number of legible words in the neat sentences and divide by two to get the writing speed per minute. Do the same for the quick sentences.
Let your child have a rest, then ask them to write for a sustained period of 10 minutes. They can write about any topic they want but should have enough ideas to last for the full 10 minutes without having to stop to think. If they are struggling to think of anything, prompt them by writing out some topic ideas. Usually children can write about themselves and their lives easily with a bit of prompting. You could write on a piece of paper placed next to them: family, hobbies, birthday, holiday, friends, sports, games, books, television. At the end of the 10 minutes, count all the words written and divide by 10 to find the sustained writing speed.
Keep all of these safe and make sure you date them so you can look back and see improvements later.
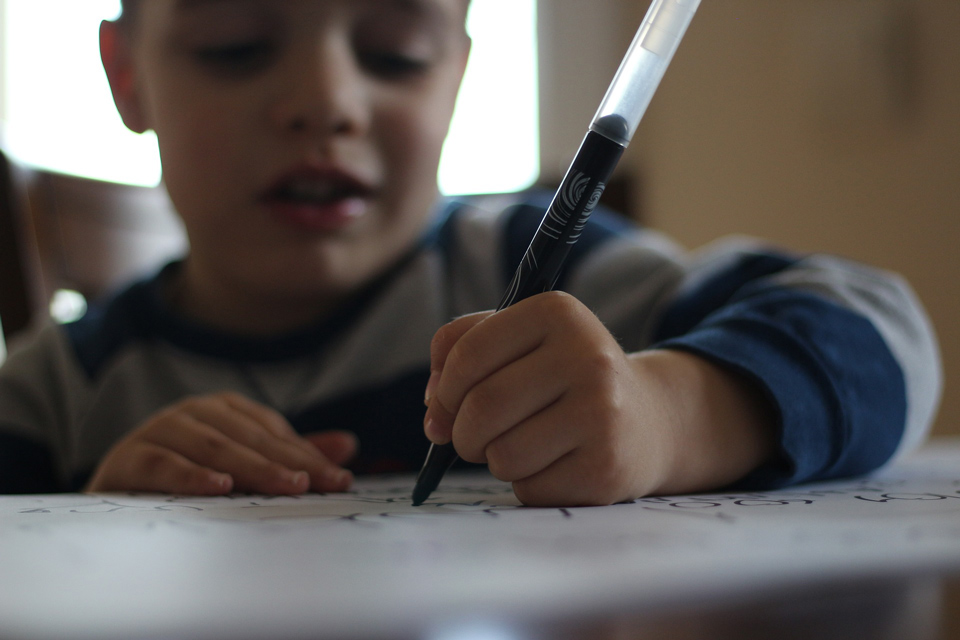
Step 3 – Check Pencil Grip and Position
When your child is writing, check their pencil grip and writing position.
A dynamic tripod grip is ideal, allowing the most movement using the fewest muscles. For more information on the dynamic tripod grip, watch the video on this page: https://www.theschoolrun.com/video-the-dynamic-tripod-grasp-for-better-handwriting .
Sometimes children, especially when there are hypermobile joints in the fingers, grip the pencil too hard and this can cause fatigue and pain. You can usually see that this is happening because there will be lighter areas on the skin or behind the nail where there is pressure. If this is happening, invest in some spongey grips to ease the pressure, such as Soft Cushion Pencil Grips.
To achieve a comfortable grip, we have found that it is best to focus on the angle of the pencil rather than the way the child is holding their fingers. The pencil should rest in the valley between the thumb and forefinger, angled towards the inner elbow.
For right-handed children, the paper should be sloped anti-clockwise by 25 to 30o. For left-handed children, the paper should be sloped steeper in the opposite direction, by 40 to 45o. Make sure your child is sat square to the table and their legs are facing forward.
Step 4 – Physical Exercises
Teach your child the following exercises and practise them every day. These are just some of the exercises recommended in Speed Up! A Kinaesthetic Programme to Develop Fluent Handwriting by Lois Addy (2004) ISBN 1855033860. Doing them will help strengthen your child’s shoulders, wrist and arm muscles to support writing. It works best to do the exercises along with your child.


Exercise 1: Shoulder Rolls
Ask your child to join you in standing up straight and put your arms straight out to the side. Make small circles with your arms and make the circles bigger and bigger, then change the direction of the circles and slowly go back to small circles. Repeat this 10 times (or as many times as you/your child can manage).
Exercise 2: Half Push Ups
Ask your child to join you in lying on the floor. Put your hands flat on the floor under your shoulders and push your chest off the floor (but not the hips) taking care to push equally with both hands, then slowly return to lying. Repeat this 10 times.
Exercise 3: Wall Push Ups
Ask your child to join you in standing one-and-a-half arms lengths away from a wall, facing the wall. Place your hands on the wall and slowly bend your arms equally so that your nose goes towards the wall (stop short of actually touching the wall with your nose!). Slowly straighten your arms to return to standing. Repeat this 10 times as well.
Step 5 – Practise Patterns


Working with felt tip (or pencil if a grip is needed) on A3 size pieces of paper in landscape orientation, ask your child to practise the above patterns and loops.
Start with just 3 or 4 patterns each day and aim to get consistently sized loops right across the page in a straight line. One common issue is that the child doesn’t move their elbow across, so that their grip stays comfortable; watch out for that and encourage your child to move their elbow, demonstrating what you mean. Some of the more complicated patterns may be difficult at first. Tell your child that their brain is having to make new connections and that if they keep working at it, it will become easier. One of the most important ones to practise is the C; many letters begin with this movement. Aim for one fluid movement from the top of one C to the top of the next.
The Handwriting Patterns Playbook from the National Handwriting Association is a good starting point and can be accessed here for free: https://nha-handwriting.org.uk/shop/handwriting-patterns-playbook/ .
Be sure to praise every little improvement you see in line with the aims: consistent sizing, straight lines, fluid formation.
Once your child is able to achieve fairly consistent, straight lines of the loops right across the page, practise them reducing the size on A4 paper in landscape orientation, then smaller again in portrait. Practise every day (or as often as you can) for 5-10 minutes after doing the above physical exercises.
Step 6 – Practise Letters
Once the patterns are fluid in the smallest size, switch to a handwriting pen and use handwriting paper to practise them again letter-size. We recommend using a book like the Rhino Handwriting Exercise Books: https://www.amazon.co.uk/RHINO-HANDWRITING-EXERCISE-BOOKS-LINES/dp/B00HF90R3O/
Tell your child about the rules of neat writing:
- The bodies of letters should all be the same size as each other. This includes the letters e, o, c, etc as well as the rounded parts of letters with ascenders and descenders, such as b and g.
- Ascenders and descenders should go to a similar length as each other and in the same direction. The usual length of ascenders and descenders is twice the size of the body of letters. Your child can choose whether they slope and what direction they slope in.
- Capital letters should be at least twice the height of the bodies of letters so that they can easily be seen as capitals.
- Spaces between words should be about the same as each other.
- Letters should sit on the line and not float above it.
Practise letters in the book one at a time. First, practise a line of the same letter across the page then put it into a word with other letters that have been practised. The letters should join to each other. For more information about cursive letters, this is a good resource: https://www.twinkl.co.uk/resource/t-l-5931-cursive-alphabet-letter-formation-poster-upper-and-lower-case
Aim for good formation of letters, where the body touches the top and bottom of the centre lines in the book, with writing that meets the rules above. One common problem is the letter L not coming all the way back down to the line.
Continue practice by asking your child to write out sentences from a favourite book or poems they like in the writing book. Once your child has filled at least one book (although two would be better), transfer to using regular lined paper and encourage them to remember the rules when they are writing.
Assess Improvement
After a time, repeat the exercises in Step 2 and see how far your child has come, both in speed and in letter formation and neatness. Share this with your child so that they can see how their hard work has paid off.
If, despite following these steps and your child putting in sustained effort, you see little improvement, it would be best to see an Occupational Therapist with an understanding of adapting practice for high learning potential and dual or multiple exceptional children. List of Occupational Therapists with awareness of high learning potential
About the author: Rebecca Howell is Potential Plus UK’s Senior Education Consultant and Director of the DME Trust. She leads various aspects of the organisation, including oversight of the assessment and advice services. She is passionate about leadership and developing new services to support members. With a background in educational leadership, she has 3 children with high learning potential/dual or multiple exceptionality.


